


3.3.2 Challenge & Steps
Course subject(s)
Module 3 – Digital 3D Models
Challenge
For now we will focus on your main ideas, the concept, and the context, i.e. the site of your dream house. These five steps will guide you through the process:
Step 1. Describe your guiding theme. What is the main idea (the main dream) in your dream house. It is very important to choose a guiding theme that fascinates you, so choose it well. A guiding theme needs to be short – just a few words.
Step 2. Make an analytical drawing of the essence of your sketch model. This should not be a detailed drawing of all the aspects that you have already shown in your first sketch model. It should be the essence of the place, and should be drawn schematically.
Step 3. Make a smaller, more abstract, version of your design. Use the drawing from Step 2 and keep your guiding theme in mind when you make a very small model of your dream house ideas. This should be around 10 times smaller than your Week 1 model. For some designs it can be 5 to 20 times smaller. For this you could think about making use of objects that already have the basic form of your design. Keep in mind that the form does not need to be exact. Like we discussed in Week 1, any feature of the model can take on a meaning. Some resemblances are good, but you are not making a mini version of reality.
Step 4. Develop the context model, including the smaller version of your design. Here you will need to get back into a playful flow and step back every now and again to visually read what you are doing. You might use a camera or pen and paper to record and annotate your process. Try to find out how your initial ideas and your guiding theme can contribute to the context model. The context (surroundings of your design) need to be in balance with the new additions. This works in two directions; how will the environment be viewed from inside the house, and how does the house fit into its future neighbourhood. The model can be totally fictitious or it can be a real environment, even with specific trees and roads taken into consideration. Keep it simple but try to capture the essence of the site you have in mind.
Step 5. Add your guiding theme text and context model pictures to Week 3 of your Weebly ePortfolio.
Good luck with the task – we wish you pleasure and inspiration with it!
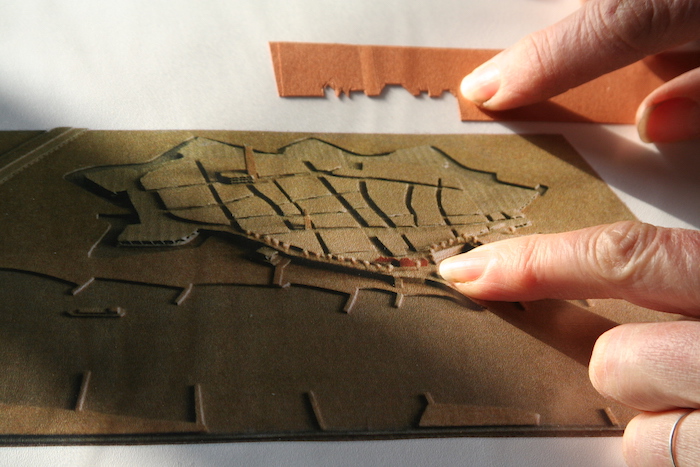
Tip: although the context model will show the largest aspects of your design, the model itself can be very small and abstract. Take a look at this picture; a whole Dutch city and a typical brick facade, made from paper and cardboard. Estimated size: 20x20cm.

Models in Architecture by TU Delft OpenCourseWare is licensed under a Creative Commons Attribution-NonCommercial-ShareAlike 4.0 International License.
Based on a work at https://ocw.tudelft.nl/courses/models-architecture-design-physical-digital-models/.