7a Introduction to Prototyping and testing a concept
Course subject(s)
Prototyping and testing a concept
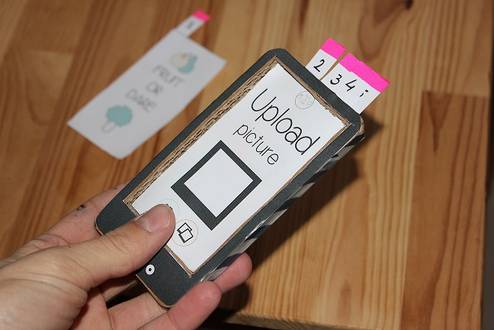
The last phase of this course has started: in the coming lectures you will be prototyping your chosen concept to be able to test some of its qualities with an actual user! Then, you will have the opportunity to present your work of the past lectures in a final presentation. This is your moment to bring your work to the limelight!
We hope you have developed a concept that addresses your design challenge and we certainly hope you have enjoyed the experience of designing throughout the course! Even if you feel your concept is not perfect yet (designers often experience that it never is!), it is good practice to make a prototype of your design and get feedback from a user. Going through cycles of analyzing your problem or challenge, synthesizing a design, simulating that design in the form of a prototype, evaluating the qualities of the design through the prototype and deciding what should be the next step is inherent in any design activity. In fact, in Delft we call this cycle the ‘Basic Design Cycle’. It’s a cycle any designer goes through at least once during a design process, but one typically goes through it many times, in an iterative manner.
In the coming lectures, we have prepared inspiration for making prototypes. Next to that, Professor Jan Buijs will put the Delft Design Approach as we have taught it in this course in perspective. He will tell you about its relation to the Delft Innovation Model and reflect on the design education in Delft.

1. Prototyping and Testing
In the video below, we show a number of tips & tricks on the process of making a prototype. We also show some techniques for using different materials to make prototypes.
2. Reflecting on your work
This is the last benchmark video made by Koen & Iris. We hope you have enjoyed watching the creative process that they have shared with you.
We have split the assignment in two parts.
Part 1: In the first part you will share your work on the assignment with your peers. We have provided a peer review module for this part.
Part 2: The second part is all about your final presentation.
Please watch the video of Koen & Iris to get inspired for your own final presentation.
Good luck with your last assignment and your final presentation! We are proud that you have stayed with us during all of our assignments.
Benchmark video design expert
Bruno Ninaber van Eijben
Bruno Ninaber van Eyben is professor of aesthetics and highly esteemed practicing designer receiving international acclaim for his work. He co-founded design consultancy NPK in 1985 and currently runs Studio Ninaber. He will introduce you to the basic principles of prototyping and testing design concepts.
Enjoy watching the video below!
Instruction videos prototyping
In the 1st year Bachelor in Delft design students use the instructions that you can watch in these three videos:
Templates Koen & Iris: Prototyping

Templates Koen & Iris: Final Presentation
3.Delft Design Approach in Context
Delft Design Approach in Context: A General View on Design Education
4. Delft Design Approach in Context: The Delft Innovation Model
Professor Jan Buijs will explain the Delft Innovation model in the video below. Professional design does not happen in a vacuum. It is typically a commercial activity that happens in a company. With the model, he provides a broader context for the Delft Design Approach.
5. Additional Material
Additional readings can be found here.
Delft Design guide
Read more about the Interaction Prototyping and evaluation in the Delft Design Guide
Sorry but there don't seem to be any downloads..
Subtitles (captions) in other languages than provided can be viewed at YouTube. Select your language in the CC-button of YouTube.

Delft Design Approach by TU Delft OpenCourseWare is licensed under a Creative Commons Attribution-NonCommercial-ShareAlike 4.0 International License.
Based on a work at https://ocw.tudelft.nl/courses/delft-design-approach/.


